Proper installation of an air conditioning (AC) system is crucial for ensuring optimal performance, energy efficiency, and longevity. Studies have shown that over 50% of residential air conditioning systems are improperly installed, leading to reduced efficiency and increased operational costs. This statistic underscores the importance of adhering to correct installation procedures. This comprehensive guide outlines the essential steps for proper AC installation, highlighting critical considerations and best practices.True Blue Heating and Coolingdowdheatandair.com
1. In-Home Consultation and Assessment
Before initiating the installation process, it’s essential to conduct a thorough assessment of the home’s cooling requirements. A licensed HVAC contractor should evaluate factors such as the size of the space, insulation quality, and existing ductwork. This evaluation helps determine the appropriate AC system size and type, ensuring efficient and effective cooling. Newer air conditioners often have larger coils, which may necessitate reconsidering the installation location to accommodate the unit’s dimensions. nexgenairandplumbing.com
2. Removal of the Existing System
If replacing an old AC unit, the removal process must be handled carefully to prevent environmental contamination and ensure safety. Certified technicians should use specialized equipment to recover and properly dispose of refrigerants, as venting them into the atmosphere is both illegal and harmful. Additionally, protecting the home’s interior during removal by covering floors and furniture can prevent damage from debris. Inspecting and sealing any leaks in the existing ductwork at this stage is also advisable to enhance the performance of the new system. nexgenairandplumbing.com+1C & C Heating & Air Conditioning+1C & C Heating & Air Conditioning+1nexgenairandplumbing.com+1
3. Preparation of the Installation Site
Preparing the site for the new AC unit involves several critical steps:
- Outdoor Unit Pad Preparation: The existing pad for the outdoor unit should be assessed and replaced if necessary. Modern units are often larger, requiring a stable, level surface. Using a vibration-absorbing composite pad is preferable over poured concrete, as it reduces noise and is less prone to cracking. Ensuring the ground is level and stable prevents future shifting that could damage the unit. nexgenairandplumbing.com+1C & C Heating & Air Conditioning+1
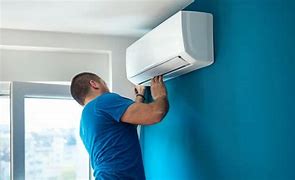
- Indoor Unit Preparation: For split systems, selecting an appropriate location for the indoor unit is vital. The unit should be mounted high on a wall in a central position within the room to facilitate optimal air distribution. Adequate clearance from the ceiling and surrounding walls ensures proper airflow and maintenance access. Pure Eco Inc
4. Installation of the Indoor Unit
Mounting the indoor unit requires precision:Pure Eco Inc+1nexgenairandplumbing.com+1
- Mounting Plate Installation: Secure the mounting plate to the wall, ensuring it is level and firmly anchored. This plate serves as the foundation for the indoor unit.
- Drilling for Piping: A hole is drilled through the wall for the refrigerant lines, drain pipe, and electrical wiring. Angling the hole slightly downward toward the exterior facilitates proper drainage and prevents water accumulation inside the unit. Better Homes & Gardens+5Pure Eco Inc+5mea.york.com+5
- Routing Connections: Carefully thread the refrigerant lines, drain pipe, and electrical wiring through the drilled hole, connecting them to the indoor unit according to the manufacturer’s specifications. Ensuring these connections are secure and free from kinks or bends is crucial for optimal performance. Pure Eco Inc
5. Installation of the Outdoor Unit
Positioning and securing the outdoor unit involves:
- Placement: Set the outdoor condenser unit on the prepared composite pad, ensuring it is level and stable. The location should be well-ventilated, away from direct sunlight and obstructions, to facilitate efficient heat dissipation. nexgenairandplumbing.com
- Connecting Refrigerant Lines: Attach the refrigerant lines to the service valves on the outdoor unit. These connections should be brazed (welded) to ensure a leak-proof seal, which is vital for maintaining the system’s efficiency and preventing refrigerant loss. Fire & Icenexgenairandplumbing.com
- Installing the Filter Dryer: A filter dryer should be installed in the liquid line near the expansion valve to absorb moisture and provide filtration, protecting the system from contaminants that could affect performance. nexgenairandplumbing.com
6. Electrical Wiring and Connections
Proper electrical connections are essential for safe operation:
- Service Disconnect Box: Mount a service disconnect box near the outdoor unit and connect it to the home’s electrical panel. Depending on the system’s requirements, this box may be fused or non-fused to provide overcurrent protection. nexgenairandplumbing.com
- High- and Low-Voltage Wiring: Connect the high-voltage (line) and low-voltage (control) wiring between the indoor and outdoor units, adhering strictly to the manufacturer’s wiring diagrams and local electrical codes to ensure safety and functionality. Pure Eco Inc
7. Refrigerant Line Evacuation and Charging
Ensuring the refrigerant system is free of contaminants involves:
- Evacuation: Use a vacuum pump to evacuate air and moisture from the refrigerant lines and indoor coil. This step is critical to prevent system inefficiencies and potential damage caused by moisture or air within the system.
- Charging: After evacuation, charge the system with the appropriate type and amount of refrigerant as specified by the manufacturer. Accurate charging is essential for optimal performance and efficiency.